

Give your cat the perfect treat with this cheap and easy catnip toy!
YOU WILL NEED:
Material scraps
Thread and needle
Stuffing
Dried catnip, available from pet shops and online retailers
Black and pink embroidery thread
METHOD:
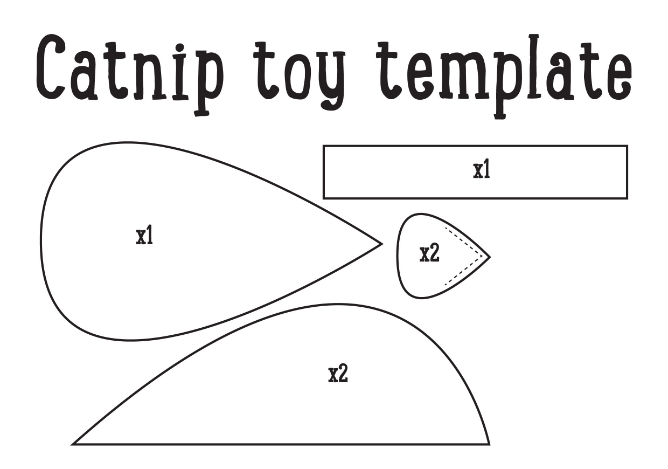
- Using the template below (click on the image to download), cut out and pin one bottom piece and two side pieces with all the pointed ends together.
- Machine straight stitch or hand stitch around the sides and top, leaving the pointed end open enough to fill with stuffing and catnip.
- Fold the tail piece in half and blanket stitch up the side, leaving one end a little open to attach the body.
- Fill the body with a mixture of stuffing and dried catnip, then attach the tail inside and close the back end.
- Blanket stitch the two ear pieces onto the body along the dotted lines in a slight curve - use a different coloured fabric to really make your ears stand out!
- Add a little detail by stitching a little nose and some eyes using embroidery thread.
- Ensure your toy is completely stitched together with no stuffing visible from the outside. Once ready... let playtime commence!
Why not stitch a few in festive fabric, and a few in plainer fabrics for fun all year round?!


No comments:
Post a Comment